Leather Manipulation
2018-07-16

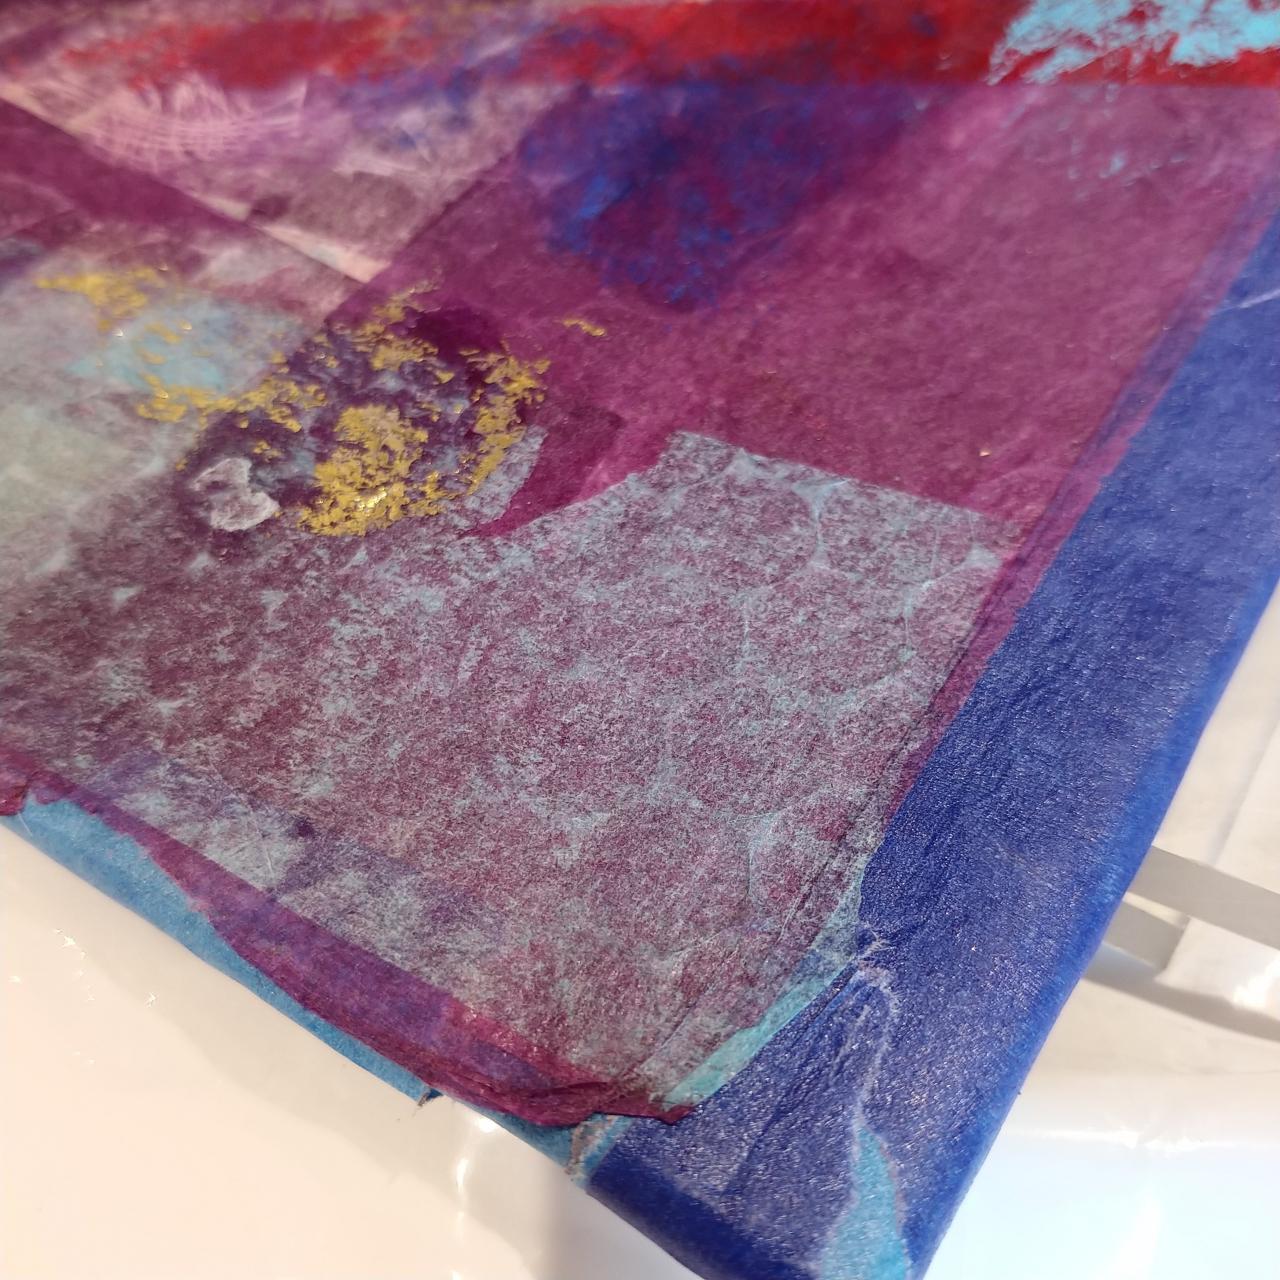
Suede with tissue paper and metallic foil
Sorry I haven't posted for a while. I had some issues in June with my server and lost a lot of blog posts, all of them has somehow drifted into the internet abyss. In the past few months a lot has changed and I have lots to write about but never enough time and I get distracted easily. I nearly got distracted and forgot that I was writing this!

Red crackle with purple dye (scrunched up during application)
In April, I went to Sydney for two classes with Coleen Curry at Andersen's Bindery. I met Coleen around the time I started bookbinding on a trip to Europe with the American Academy of Bookbinding. Coleen is Canadian bookbinder living in Muir Beach, California. She lived in Hong Kong many years ago and she would tell me stories about when she was in Hong Kong and the neighbourhood that she lived in and the people there. Since the Europe trip I have seen her a few times in Telluride at the Academy when she was assisting Don Glaister's class.

Suede with different colours of tissue paper, this shows the impression of bubble wrap
This class with Coleen was all about manipulating leather. I wanted to do this to help my creativity a bit. I feel like with the work that I did in conservation, more on this in another blog, it limited my creativity and made me think within the box too much. This leather manipulation class we tried out all sorts of things and it was really about just testing out how different materials react to glue, dyes, pressure, sanding, etc. We started off working on a piece of suede, taped it down to board to keep it taut, we pasted down different colours of tissue paper nipped it in the press and let it dry. After it's dry we sanded the surface with different things under the suede to give it a texture. It's all about building up layers like lacunose and then sanding.
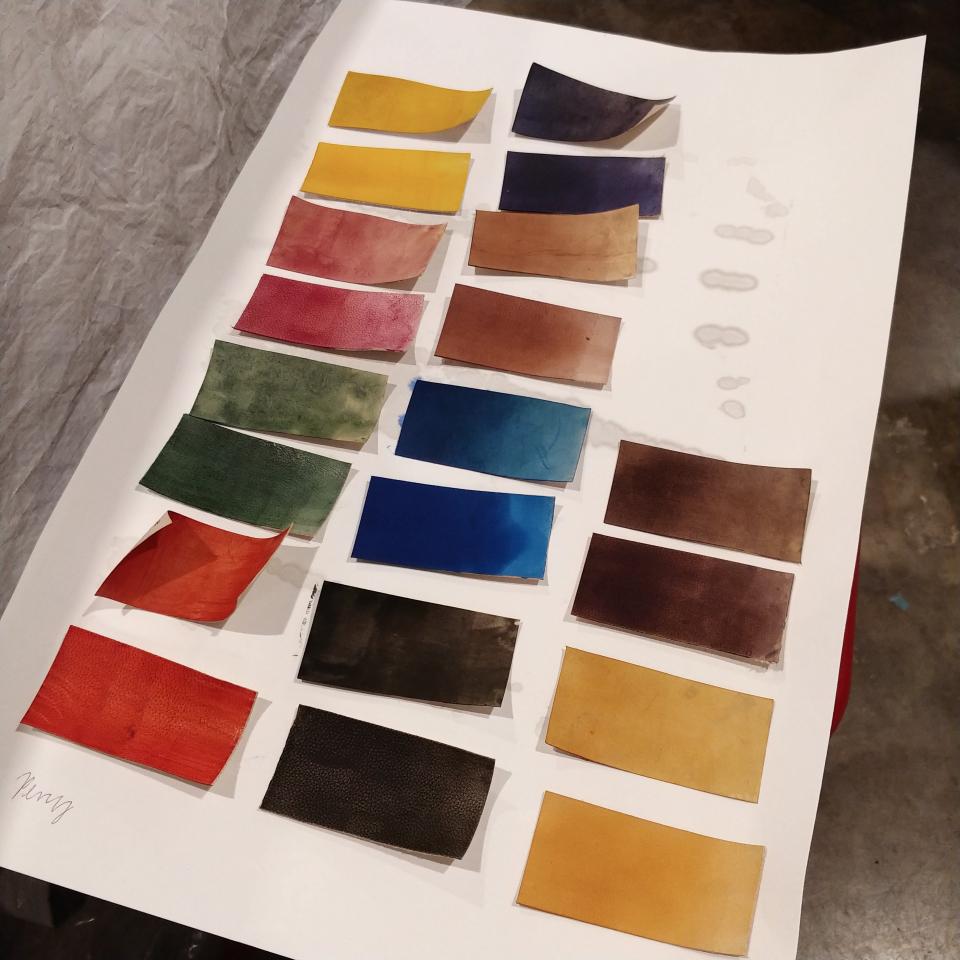
Dye swatches
We also used aniline leather dyes to dye swatches of leather, both goat and calf to see the difference in the finish. I chose to do the swatches with gradation, so the lightest is just one layer of dye to the darkest being four layers. We also did some crackle, where you paste up a piece of leather and let dry and then crack it up and apply ink in the cracks then wash off the paste. You can do this a few times so that you have different cracked lines.
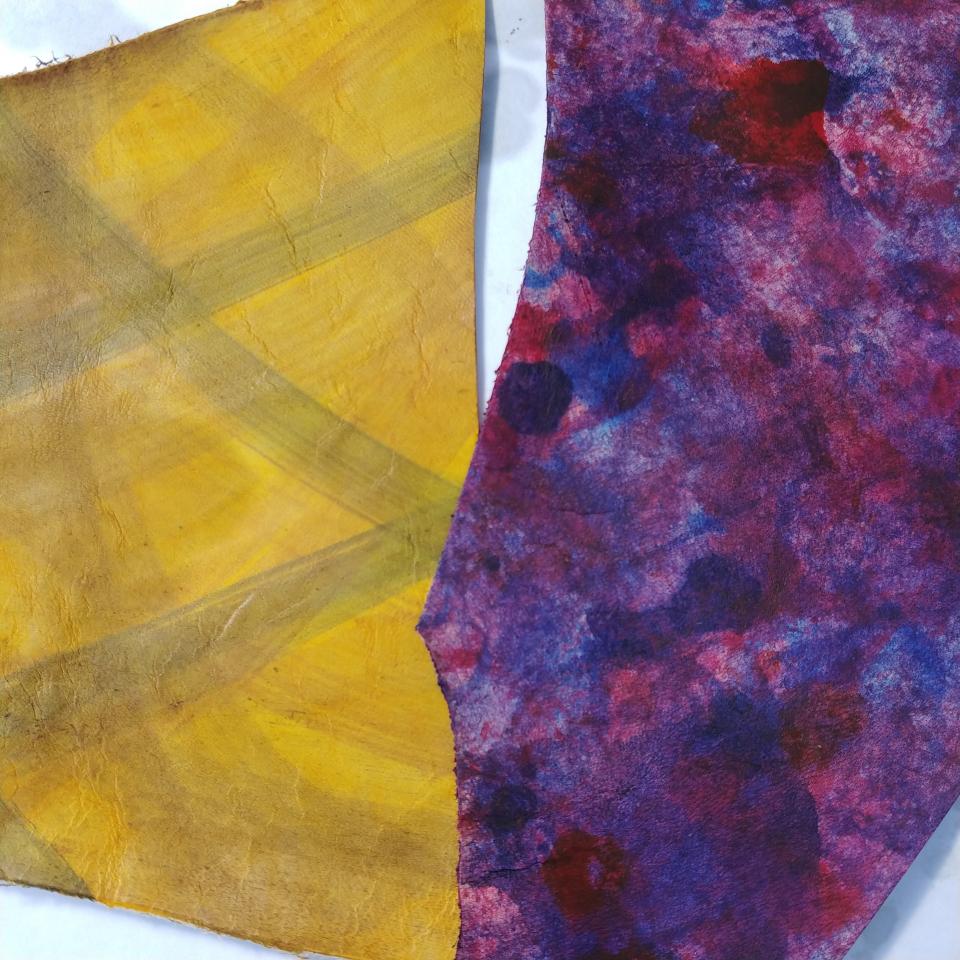
Aniline dyed kangaroo skin, applied with brush and sponge
I really enjoyed being able to experiment with all these different ways of creating a surface to use. I think it would have been better if I prepared more so that I could have done more experiments. I think this is always the case when I go for a class, I always want to prepare more before I go and I don't end up doing that and then after it I feel like I didn't make the most out of the time.